Christmas fudge has been part of American holiday candy-making since at least the late 1800s, when women's colleges in the Northeast started passing around recipes for this cooked-sugar confection. The real thing, the old fashioned kind, is made by cooking sugar, cocoa, butter, and milk to the soft ball stage, then beating it until it transforms from a glossy liquid into a thick, matte, sliceable block. It requires a candy thermometer and about 20 minutes of attention, but the result is a fudge with depth and texture that no shortcut recipe can match.
This chocolate fudge recipe skips the condensed milk and marshmallow creme that dominate most modern versions. Instead, it relies on proper crystallization: cooking to exactly 114C (238F), cooling undisturbed, then beating at the right moment. The payoff is fudge that is dense and smooth with a slight grain, not gummy or waxy. Once you understand the technique, it becomes the easiest Christmas candy to make in bulk for gifting.
Equipment
Instructions
Tap each step to track your progress
- 1
Line a 9x9 inch square baking pan with parchment paper, leaving overhang on two sides. Lightly grease the parchment with butter. Set aside.
- 2
Combine the sugar, sifted cocoa powder, and fine sea salt in a heavy-bottomed 3-quart saucepan. Whisk them together while dry to break up any cocoa clumps. Pour in the milk and stir until the mixture is mostly smooth. A few small lumps are fine; they will dissolve during cooking.
- 3
Place the saucepan over medium heat and stir gently with a wooden spoon until the sugar fully dissolves and the mixture comes to a boil. This takes 4 to 5 minutes. Once it boils, stop stirring entirely. Clip a candy thermometer to the side of the pan, making sure the tip is submerged but not touching the bottom.
- 4
Let the mixture cook without stirring until it reaches 114C (238F), the soft ball stage. This takes 10 to 15 minutes depending on your stove. Do not stir during this time. If sugar crystals form on the sides of the pan, brush them down with a wet pastry brush. The mixture will bubble steadily and darken slightly.
- 5
Remove the pan from the heat the moment it hits 114C (238F). Drop the butter pieces and vanilla extract onto the surface. Do not stir. Let the fudge cool undisturbed in the pan until the bottom of the saucepan feels warm but not hot to the touch, roughly 50C (120F) on the thermometer. This takes 30 to 45 minutes. Patience here is essential; beating too early produces grainy fudge.
- 6
Remove the thermometer. Using a wooden spoon or sturdy spatula, beat the fudge vigorously. It will start glossy and pourable. After 3 to 5 minutes of steady beating, the fudge will begin to thicken, lose its sheen, and hold its shape when you lift the spoon. The moment it looks matte and starts to feel heavy, stop beating. If adding nuts or cranberries, fold them in with the last few strokes.
- 7
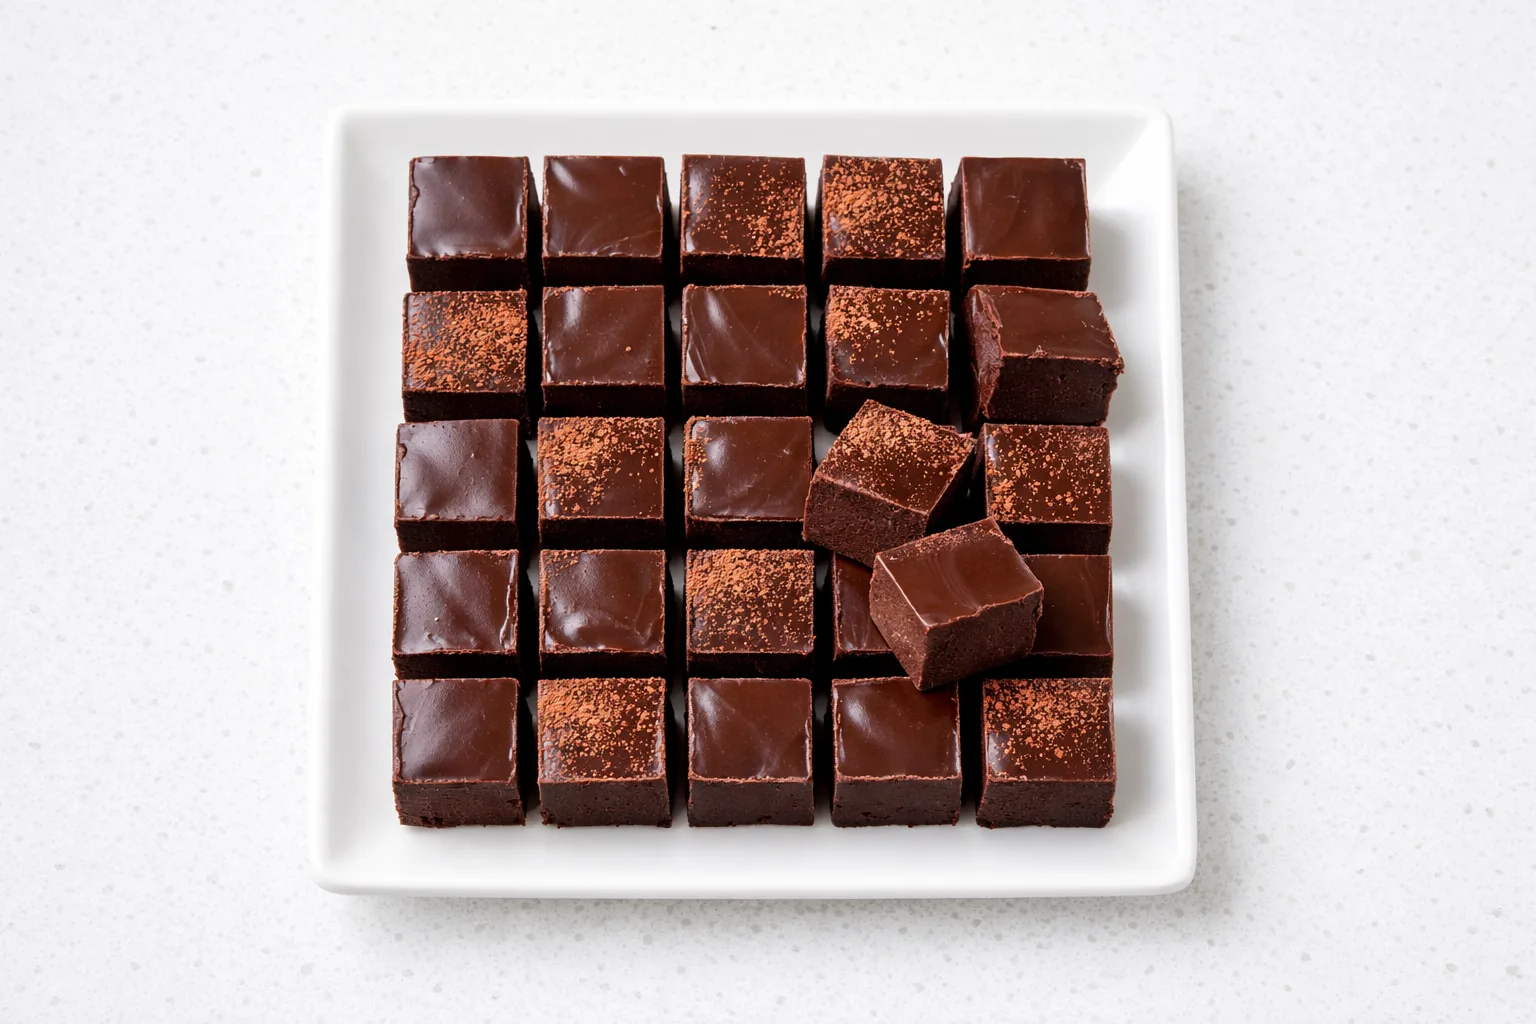
Immediately pour and scrape the fudge into the prepared pan. Spread it evenly with the spatula. Work quickly; it sets fast. Sprinkle flaky sea salt over the top if using. Let it cool completely at room temperature for at least 2 hours, then lift out by the parchment overhang and cut into 36 pieces with a sharp knife.
Tips & Tricks
Use a real candy thermometer
Digital instant-read thermometers are fast but unreliable for candy because you need to monitor the temperature continuously. A clip-on candy thermometer lets you watch the climb from 100C to 114C without hovering. Calibrate it first: if it reads anything other than 100C (212F) in boiling water, adjust your target temperature accordingly.
Sift the cocoa powder before adding
Dutch-process cocoa clumps badly when it hits liquid. Sifting it and whisking it with the sugar while everything is still dry ensures the fudge cooks evenly and the finished texture is perfectly smooth. Skipping this step risks finding gritty cocoa pockets in the final product.
Do not stir while boiling
Stirring a boiling sugar syrup causes crystals to form on the spoon and the sides of the pot, which then fall back in and seed the entire batch. Once it reaches a boil, hands off. If crystals appear on the sides, brush them down with a wet pastry brush.
Cool the fudge undisturbed
The cooling period is not optional. Beating the fudge while it is too hot creates large, coarse sugar crystals and a grainy texture. Let it cool in the saucepan on the counter, with the butter sitting on top, until the bottom of the pan is warm but not hot. Most recipes fail at this step because people rush it.
Make a double batch for gifting
Fudge scales up easily and keeps well, making it ideal for Christmas gift batches. Use a larger pot (4 or 5 quart) and a 9x13 pan for a double batch. The cooking time increases by a few minutes. One double batch yields about 72 pieces, enough for several gift tins.
Troubleshooting
My fudge is grainy and crumbly
You either stirred the mixture while it was boiling (which seeds premature sugar crystals) or beat it before it cooled enough. The fudge must cool to roughly 50C (120F) before you start beating. Next time, leave it alone while cooking, and test the cooling with your thermometer rather than guessing.
The fudge never set and stayed soft
It did not reach the proper temperature. A few degrees matter in candy-making. Calibrate your thermometer by checking it in boiling water (it should read 100C / 212F at sea level). If you are at high altitude, reduce the target temperature by about 1C for every 300 meters above sea level.
My fudge is too hard and dry
It was cooked past 114C (238F), likely into the firm ball stage (118C+). The difference between soft, creamy fudge and a chalky block is just a few degrees. Pull the pan from the heat the instant your thermometer reads 114C. Do not wait for it to "settle in" at that temperature.
The fudge seized up while I was beating it
You waited too long to pour it into the pan after it started to set. Once the fudge loses its gloss and thickens, you have 30 to 60 seconds before it becomes unworkable. Have your prepared pan right next to the stove so you can transfer it immediately. If it does seize, you can try kneading it like dough, pressing it into the pan, and accepting a slightly rougher texture.
Variations
Peanut Butter Swirl Fudge
After pouring the chocolate fudge into the pan, drop tablespoon-sized dollops of creamy peanut butter (about 1/3 cup total) across the surface. Drag a knife or skewer through in a zigzag pattern to create marbled swirls. The peanut butter stays soft against the set chocolate, creating a contrast in both texture and flavor.
Peppermint Bark Fudge
Stir 1/2 teaspoon of pure peppermint extract into the fudge along with the vanilla. After pouring into the pan, sprinkle 1/3 cup of crushed candy canes over the top and press gently so they stick. The mint and chocolate combination is a natural fit for Christmas, and the red and white candy cane pieces make it look festive without any additional effort.
Vegan Chocolate Fudge
Replace the whole milk with full-fat coconut milk (canned, well-shaken) and the butter with refined coconut oil. The cooking process is identical, though the fudge may take slightly longer to reach soft ball stage. The coconut flavor is subtle once the cocoa and vanilla are in play. Cool and beat exactly as directed; the fudge sets a bit firmer than the dairy version.
Maple Walnut Fudge
Replace 1 cup of the granulated sugar with 1 cup of pure maple syrup and reduce the milk to 1 cup. Fold in 1 cup of toasted walnut halves during the beating stage. The maple gives the fudge a deeper, more caramel-like sweetness that tastes distinctly North American. Use grade A dark maple syrup for the strongest flavor.
Serving & Gifting
Cut fudge into 1-inch squares for serving on a candy platter alongside other Christmas sweets. It pairs well with strong coffee, black tea, or a glass of cold milk. For a more polished presentation at holiday parties, use a warm knife (dipped in hot water and wiped dry between cuts) for clean edges. Fudge is one of the best homemade Christmas gifts: stack pieces in a parchment-lined tin, cellophane bag, or small box tied with ribbon.
Storage & Freezing
Fudge keeps at room temperature in an airtight container for up to 2 weeks. Layer pieces between sheets of wax paper or parchment to prevent sticking. In the refrigerator, it lasts up to 3 weeks; let it come to room temperature for 15 minutes before eating, as cold fudge loses some of its creaminess. For longer storage, wrap individual pieces in wax paper, place in a freezer bag, and freeze for up to 3 months. Thaw in the refrigerator overnight.
Common Questions
Can I use natural cocoa powder instead of Dutch-process?
Yes, but the flavor will be sharper and less smooth. Dutch-process cocoa is alkalized, which gives it a milder, deeper chocolate taste and a darker color. If you only have natural cocoa, the fudge will still work; it will just taste slightly more acidic and be a bit lighter in color.
How do I know when the fudge is ready to pour?
The fudge is ready when it loses its glossy shine and becomes matte, thickens noticeably, and starts to hold its shape briefly when you lift the spoon. This happens suddenly after several minutes of beating. Have your pan ready because you need to transfer it within 30 to 60 seconds of this change.
Can I make fudge without a candy thermometer?
You can use the cold water test: drop a small amount of the hot mixture into a glass of cold water. At the soft ball stage, it should form a soft, pliable ball that flattens when you press it. A thermometer is far more reliable, though, and a basic one costs just a few dollars.
How long does homemade fudge last?
Properly stored in an airtight container, fudge keeps for 2 weeks at room temperature, 3 weeks refrigerated, and up to 3 months frozen. Layer pieces between parchment or wax paper to keep them from sticking together.
Why is my fudge not as dark as store-bought?
Store-bought fudge often uses chocolate liquor, additional food coloring, or significantly more cocoa. This recipe produces a rich medium-brown color. If you want darker fudge, use a high-quality extra-dark Dutch-process cocoa (like Valrhona or Cacao Barry) and be sure to sift it well.
Is old fashioned fudge better than the condensed milk version?
They are different confections. Condensed milk fudge (sometimes called fantasy fudge) is essentially a ganache: soft, glossy, and very sweet. Old fashioned cooked fudge has a drier, slightly crumbly texture with a more complex flavor because the sugar caramelizes during cooking. The traditional method takes more effort but produces a fudge with better depth and a longer shelf life.