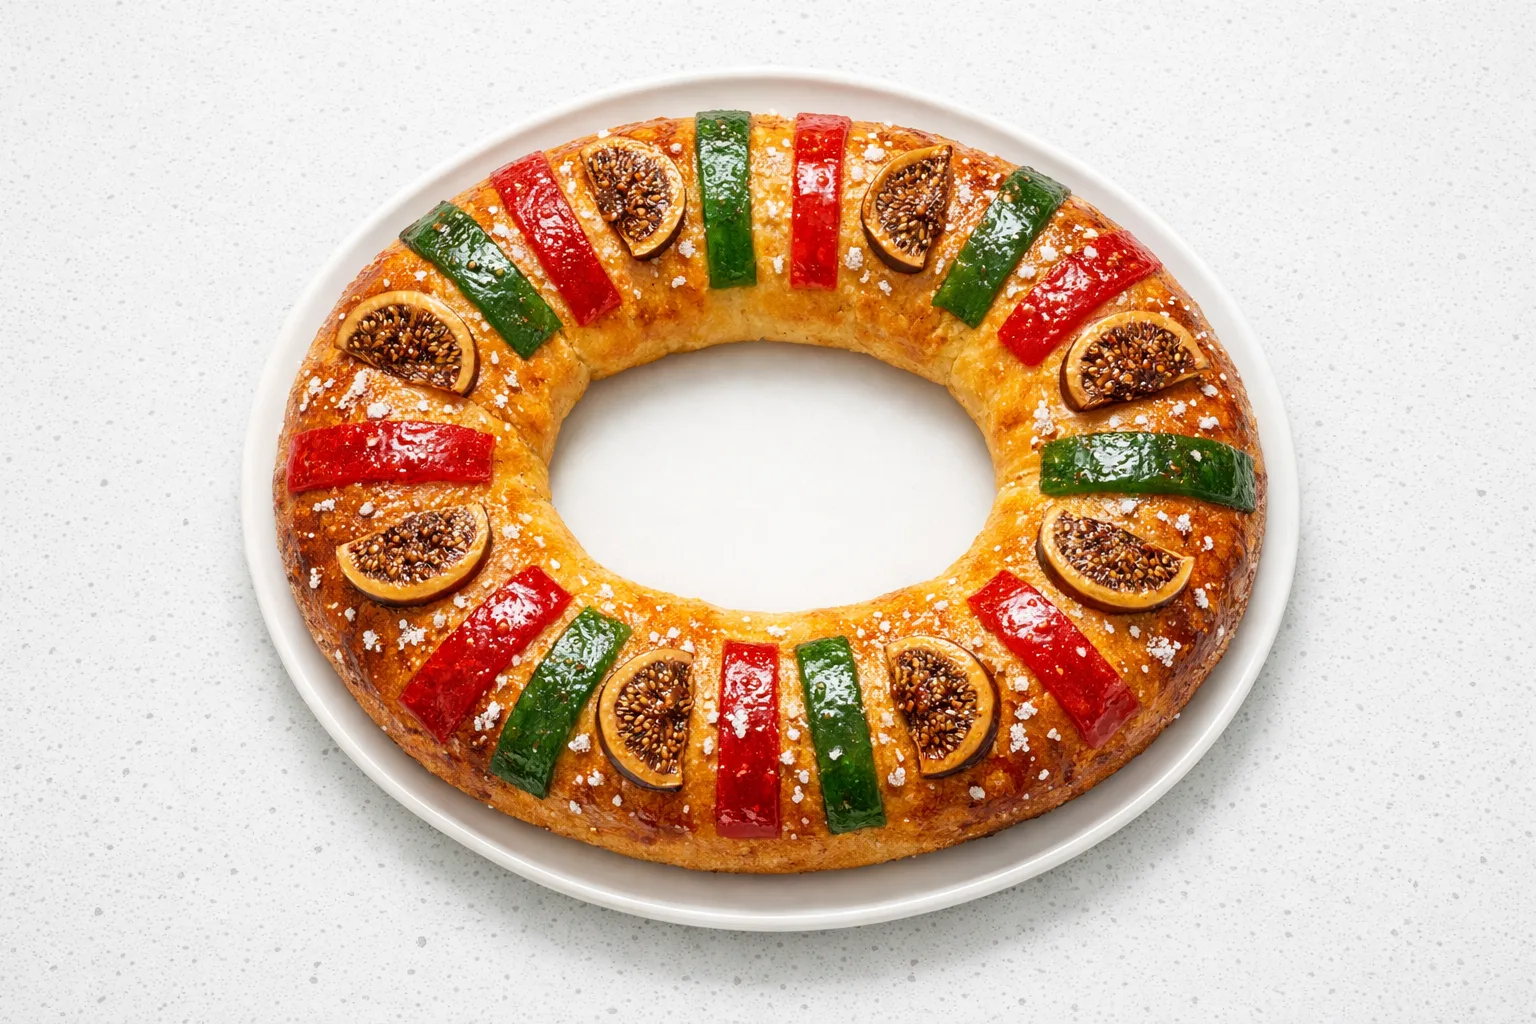
Rosca de reyes is the sweet bread baked across Mexico and Latin America every January 6th for Dia de los Reyes Magos, the Feast of the Three Kings. The oval ring shape represents the crowns of Melchior, Caspar, and Balthasar; the candied fruit pressed into the dough stands for the jewels. What makes it different from other enriched breads is the combination of orange zest and a small amount of anise in the dough, which gives it a distinctly festive fragrance that fills the kitchen as it bakes.
Hidden inside the baked loaf are one or more small plastic figurines of the baby Jesus. Whoever finds a figurine in their slice is el padrino or la madrina and is obligated to host a fiesta on February 2nd (Candlemas), providing tamales for the group. This recipe produces a properly enriched dough using the creaming method with softened butter folded in stages, resulting in a bread that stays tender for days rather than going stale overnight like a leaner version would.
Equipment
Instructions
Tap each step to track your progress
- 1
Proof the yeast: combine the warm milk, 1 tsp of the sugar, and the yeast in a small bowl. Stir and let sit for 8 to 10 minutes until foamy. If it doesn't foam, the yeast is dead; start over with fresh yeast.
- 2
In a stand mixer fitted with the dough hook, combine the flour, remaining sugar, and salt. Mix briefly on low to combine. Add the yeast mixture, eggs, vanilla, orange zest, lemon zest, and anise. Mix on low for 2 minutes until a shaggy dough forms, then increase to medium and knead for 5 minutes.
- 3
With the mixer running on medium-low, add the softened butter a few pieces at a time, waiting for each addition to incorporate before adding the next. This will take about 5 minutes. Once all the butter is in, increase speed to medium and knead for another 6 to 8 minutes until the dough is smooth, elastic, and slightly tacky but not sticky. It should clear the sides of the bowl.
- 4
Shape the dough into a ball, place in a lightly oiled bowl, and cover with plastic wrap. Let rise at room temperature for 1 1/2 to 2 hours until doubled in size. Alternatively, refrigerate overnight (8 to 12 hours) for a slower, more developed flavor.
- 5
Line a large baking sheet with parchment. Punch down the risen dough and place it on a lightly floured surface. Poke a hole through the center of the dough ball and gently stretch it into an oval ring roughly 12 inches across. Place on the baking sheet. Tuck the plastic figurines into the underside of the dough from below, pressing them up into the ring so they are completely enclosed in the dough and invisible from above.
- 6
Cover loosely with oiled plastic wrap and let rise for 45 minutes to 1 hour, until noticeably puffed. Toward the end of the rise, preheat the oven to 350F (175C).
- 7
In a small bowl, mix the 2 tbsp softened butter with the 1/3 cup sugar to form a thick paste. Brush the surface of the ring generously with the beaten egg wash.
- 8
Arrange the decoration: press strips of candied orange peel, halved figs, and candied citron or cherries into the surface in alternating groups around the ring, gently pressing them in so they sit flush rather than perching on top. Dollop small amounts of the butter-sugar paste between the fruit groups.
- 9
Bake for 28 to 32 minutes until deep golden brown. The internal temperature should reach 190F (88C) and the bread should sound hollow when tapped on the bottom. If the fruit is browning too quickly in the last 10 minutes, tent loosely with foil.
- 10
While the bread is baking, make the glaze: combine water and sugar in a small saucepan over medium heat, stir until dissolved, and simmer for 2 minutes until slightly syrupy. As soon as the rosca comes out of the oven, brush the glaze over the top for shine. Cool on a wire rack for at least 20 minutes before serving.
Tips & Tricks
Use room temperature eggs and butter
Cold eggs and cold butter will fight against each other in the dough, producing a lumpy, uneven mix. Take both out of the refrigerator at least an hour before you start. The butter should be soft enough to press a finger indent into it easily.
Chill the dough overnight for better flavor
The longer, cold fermentation in the refrigerator develops complexity in the orange and anise notes that a same-day rise simply cannot achieve. Mix the dough the evening before, refrigerate it, and shape it the next morning. The bake can happen the morning of January 6th.
Insert figurines from below
Tucking figurines into the underside of the shaped ring keeps them completely hidden and prevents them from showing through the top decoration. Press them far enough into the dough that they are fully enclosed. If you bake them inside, warn your guests so no one bites down hard on plastic.
Test doneness with a thermometer
Do not judge enriched bread by color alone; the crust browns quickly because of the sugar. A probe thermometer reading 190F (88C) at the center is the definitive test that the interior is fully set.
Decorate the fruit flush, not piled up
Fruit that sits on top of the dough will fall off during baking or burn before the bread is done. Press each piece firmly into the dough surface so it is partially embedded. It should not move when you nudge it.
Troubleshooting
The dough is too sticky to shape
This is normal with enriched dough and often means the butter was too soft or the room is warm. Refrigerate the dough for 20 to 30 minutes, then try shaping again. Do not add extra flour; it will make the bread dense and dry.
My ring collapses or loses its shape during baking
The dough ring needs to be taut when shaped, not loosely draped. When stretching it into a ring, work gently but firmly. If the ring was too loose, it will spread flat rather than puff up. Make sure the ring is at least 2 1/2 inches wide so it has enough mass to hold its structure.
The bread is pale on the outside but cooked through inside
Enriched doughs with a lot of sugar can resist browning. Increase oven temperature by 10 to 15 degrees for the last 5 minutes, or move the pan to a higher oven rack. The egg wash also helps; make sure it coats the full surface evenly.
The candied fruit is burning before the bread is done
Tent the rosca with aluminum foil after the first 20 minutes. The foil slows the browning of the exposed fruit while the interior continues to cook to temperature.
The figurines melted or cracked
Plastic figurines must be heat-resistant and food-safe. Cheap plastic can melt at baking temperatures. Use figurines specifically sold for this purpose, or insert them into the bottom of the baked loaf with a skewer after it comes out of the oven rather than baking them inside.
Variations
Cream Cheese Filling
Split the risen ring of dough horizontally before the second rise and spread a filling of 200g softened cream cheese mixed with 3 tbsp sugar and 1 tsp vanilla along the interior. Pinch the dough closed, then let rise and bake as normal. The cream cheese melts into a custardy layer inside and makes the rosca much richer. This version has become popular in Mexico City bakeries and is worth the extra step.
Vegan Adaptation
Replace the eggs in the dough with 3 flax eggs (1 tbsp ground flax plus 3 tbsp water per egg, rested 5 minutes) and use plant-based butter at the same weight. Replace the egg wash with oat milk and replace the whole milk with oat milk. The texture will be slightly denser, but the orange and anise flavor comes through just as well. Use plant-based cream cheese for the filling variation.
Mini Individual Roscas
Divide the dough into 12 equal pieces, shape each into a small ring, and arrange on parchment-lined baking sheets. Reduce the bake time to 18 to 20 minutes. Each guest gets their own rosca. This format works well for parties where you want everyone to participate in the figurine tradition without sharing a single loaf.
Chocolate-Orange Rosca
Add 3 tbsp Dutch-process cocoa powder to the flour and increase the orange zest to 2 full tablespoons. The dough will be darker, and the chocolate amplifies the citrus without overwhelming it. Decorate with candied orange peel only and skip the sugar paste topping; instead, drizzle dark chocolate over the baked ring once cooled.
Serving & Gifting
Serve the rosca at room temperature on a large platter with mugs of hot chocolate (<em>chocolate caliente</em>) or coffee with milk. Slice at the table so everyone can check their slice for the hidden figurine. For a gathering, provide small plates and napkins and let everyone pull their piece from the ring at once, which is the traditional way to distribute it. If making ahead for a party, bake the day before and re-warm in a 300F oven for 10 minutes before serving.
Storage & Freezing
Store the rosca covered at room temperature for up to 2 days; after that, the crumb begins to dry out. Wrap individual slices tightly in plastic and they will keep for 3 to 4 days. To freeze, wrap the whole ring or individual slices in plastic wrap, then foil, and freeze for up to 2 months. Thaw at room temperature for 2 hours or in a 300F oven for 15 minutes directly from frozen. Do not refrigerate the rosca; refrigeration dries out enriched breads faster than room temperature storage.
Common Questions
What is rosca de reyes?
Rosca de reyes is a sweet, oval-shaped bread baked in Mexico and across Latin America to celebrate <em>Dia de los Reyes Magos</em> (Three Kings Day) on January 6th. The ring shape symbolizes the crowns of the Three Kings, and the candied fruit decoration represents the jewels in those crowns. A small figurine of the baby Jesus is hidden inside, and whoever finds it in their slice is responsible for hosting a party on February 2nd.
What day do you eat rosca de reyes?
Traditionally, rosca de reyes is eaten on January 6th, which is <em>Dia de los Reyes Magos</em> (Three Kings Day or Epiphany). In Mexico, it marks the end of the Christmas season. Many families also eat rosca on the evening of January 5th as part of the celebration.
Can I make rosca de reyes without a stand mixer?
Yes, but it takes more effort. Mix the dough by hand until a shaggy mass forms, then knead on a floured surface for 10 minutes. Add the butter a few pieces at a time, kneading each addition in fully before adding the next. The dough will be sticky and messy at first; resist adding more flour. After about 15 to 20 minutes of hand kneading it should become smooth and elastic.
What figurines go inside the rosca?
Traditionally, small plastic figurines of the baby Jesus are used. They are sold in Mexican grocery stores and specialty shops in packs. If you cannot find them, any small heat-safe figurine works, or you can insert a small dried bean or pecan half instead. Just warn guests that something is hidden inside.
How do I know when rosca de reyes is done baking?
The bread is done when the crust is deep golden brown, the internal temperature reads 190F (88C) on an instant-read thermometer, and the bottom sounds hollow when tapped. Do not rely on color alone, since the sugar in the dough causes it to brown faster than plain bread.
Can I use instant yeast instead of active dry yeast?
Yes. Use the same amount (2 1/4 tsp) and skip the proofing step. Add the instant yeast directly to the flour. The rise times will be about 20 percent shorter, so keep an eye on the dough rather than following times rigidly.